Thursday, September 15, 2011
Artichoke Lantern
My first tutorial! Even though there is absolutely NO sewing involved in this project, it's still worth sharing!
What you need:
Japanese Lantern (Mine was getting pretty beat up, so I decided to give it a makeover.)
Glue gun,
Pages from a book (I used Hardy Boys because my husband found a box of them by the dumpster)
Scissors,
Patience.
The first step is to cut about a bazillion of these. I will call them fish scales. They are only about 2 1/4 inches wide X 3 inches tall. Snip the bottoms twice as shown and voila.
Start on the bottom of the lantern. Using the excess paper from cutting the "fish scales", mask the hole and make 4-5 of these combs and apply to the hole's entrance, like shown below.
Glue 1 1/2-2 inch pieces all the way around, and then apply the scales. Make sure to space them about an inch apart all the way around, so that you can overlap the scales. Kind of like stacking sugar cookies. Once the scales are set, glue more 1 1/2-2 inch strips OVER the fish scale ends. The goal is to cover up all of the lantern and any imperfections. It should look like the picture above.
Cut, clue, repeat. Repeat. And... repeat. It's pretty time consuming, so don't get discouraged if it takes a long time.
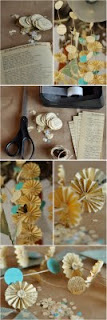
The little decorative fan-flowers I used up top are miniature versions of a paper garland I found on projectwedding.com
Ta da! Mission accomplished:) Here is a picture of it in the dark... For the full affect.
The End. Happy gluing!
Subscribe to:
Post Comments (Atom)


Very resourceful! I like the way it looks in the dark! Did you notice a difference in the amount of light it gives off?
ReplyDeleteIt's a bit more dim, but I am glad about that:)
ReplyDelete